
So you have an item sitting in front of you and you need to recreate it digitally. What now?
There is no short-cut in getting a digital model, even with laser scanning and photogrammetry, you will need to make it (or pay someone to do it for you). I am making the assumption that you want to do that yourself and here are a few tools to helping you get that done.
First you need to have a 3d modeling/cad tool and there are a lot of options. We are not covering those in this post, but a few we love to use: Autodesk Fusion360, SketchUp, Blender, Rhino, TinkerCAD and Shapr3D (for iPad). Pick one, and get started. We will cover each of these in a future post, ask if you are having trouble deciding.
Now on to the important parts of this getting the measurements you need, to be able to draw your design digitally and to do that you have to:
Measure, Draw, Measure and Draw
You are going to have to measure the original item(s) and the right tool to do that depends on the design, accessibility and ease to reach to the design. A few tools that stay on my desk and in my work bag includes (starting at the top left):
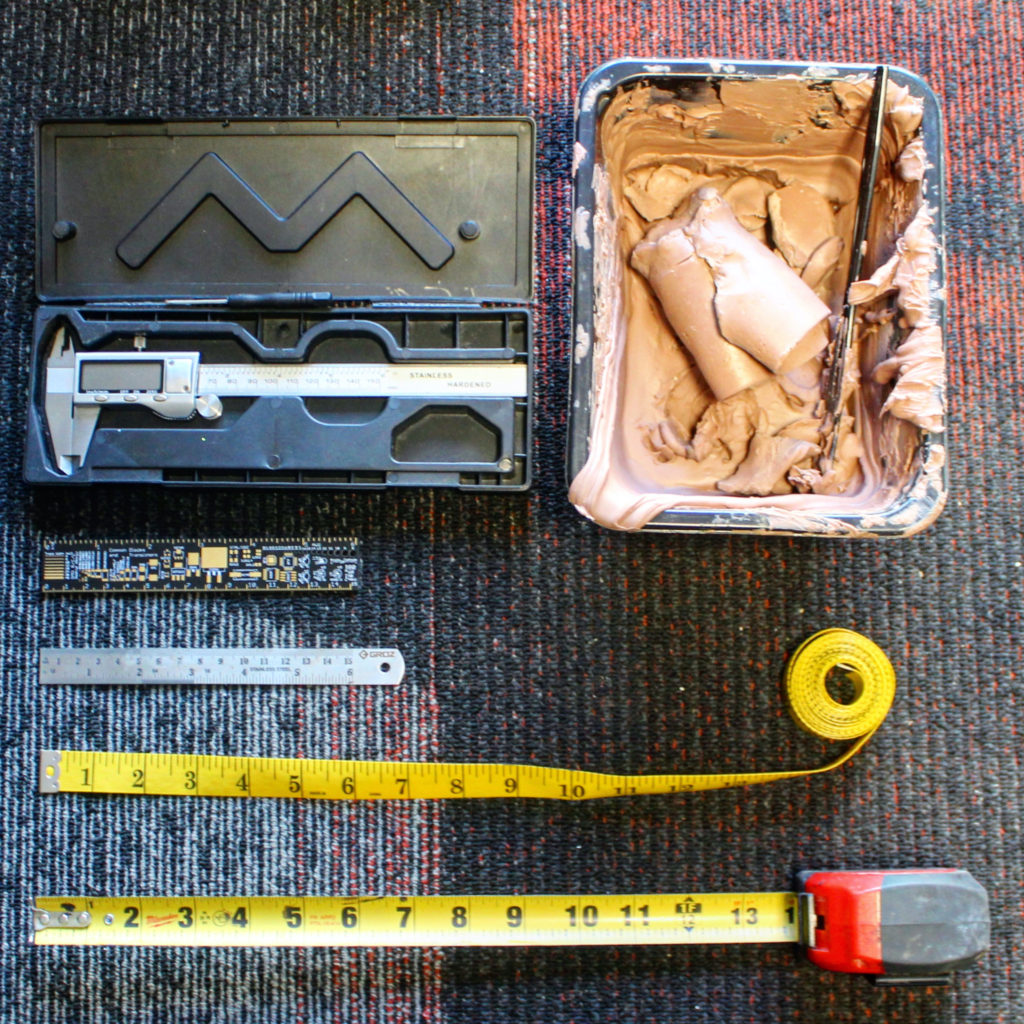
Invest in a good set of 6″ Digital Calipers (two decimal points of precision is ok, three even better but may cost a bit more) that can measure in inches and mm. Tip: Get the metal ones ,not the plastic ones, they will last longer.

These are especially helpful because you can measure in one of three ways using the calipers (between the grips, outside of the grips and on the bottom it can extend into crevices you might be able to easily reach. Take some time to work with these, extremely helpful and I use this multiple times daily in fabrication and design.
Monster Clay (Hard) is an invaluable resource for a number of things. Filling in holes, making molds, sculpting parts and more… or in the measurement case where you have a hard to reach area, soften the clay and mush (or heat up and pour) into your part then pull out and you have that portion with a negative cavity to measure easier.

PCB Ruler 6″ – If you are working with electronics all of the small parts, different trace widths, wire thickness, components and more in one easy to reference ruler. this is helpful to figure out space and other

Stainless Steel Ruler is highly useful to keep in your sketch book, tucked away in your bag and always available to pull out and measure a part or idea. Bonus: Many of these have conversion charts or other references on the back side that are also useful (ex. tap sizes, conversion charts, etc…)

Extra Long Flexible Tape Measure Many times your parts are not flat, they can be tapered, have bends and more and a long flexible tape allows you to follow along a contour better. Bonus, it travels really well in your work bag.

Measuring Tapes are useful for longer parts, I don’t have a particular brand I like more than others but one thing I have found is get one with a start end that does not move in/out. In some projects with a higher level of detail, this has thrown things off by a 1/16″ or so.
Is there a tool you use for measuring and referencing in your design to prototype that I missed and should know about? Let me know, would love to learn about it and share with others.
Leave a Reply